


Hello, buddies! In this article, we are going to build a desktop-based weather app using Python, Tkinter, and TuyaAPI that will be able to share real-time weather data (Temperature, Humidity, and Wind speed) by using the Latitude and Longitude entered as input. Before we get started, let me introduce Tuya Cloud Development to you.
Tuya Smart is a global IoT development platform that builds interconnectivity standards to bridge the intelligent needs of brands, OEMs, developers, and retail chains across a broad range of smart devices and industries. Based on the global public cloud, Tuya connects different intelligent scenarios and smart devices by providing hardware development tools, integrating public cloud services, and offering an intelligent business development platform.
Tuya's Public cloud services include Email service, SMS service, Voice Message service, Weather Service as well as Notification service.
Note: If you want to learn more about TuyaAPI for Python, refer this article
Why use Tuya?
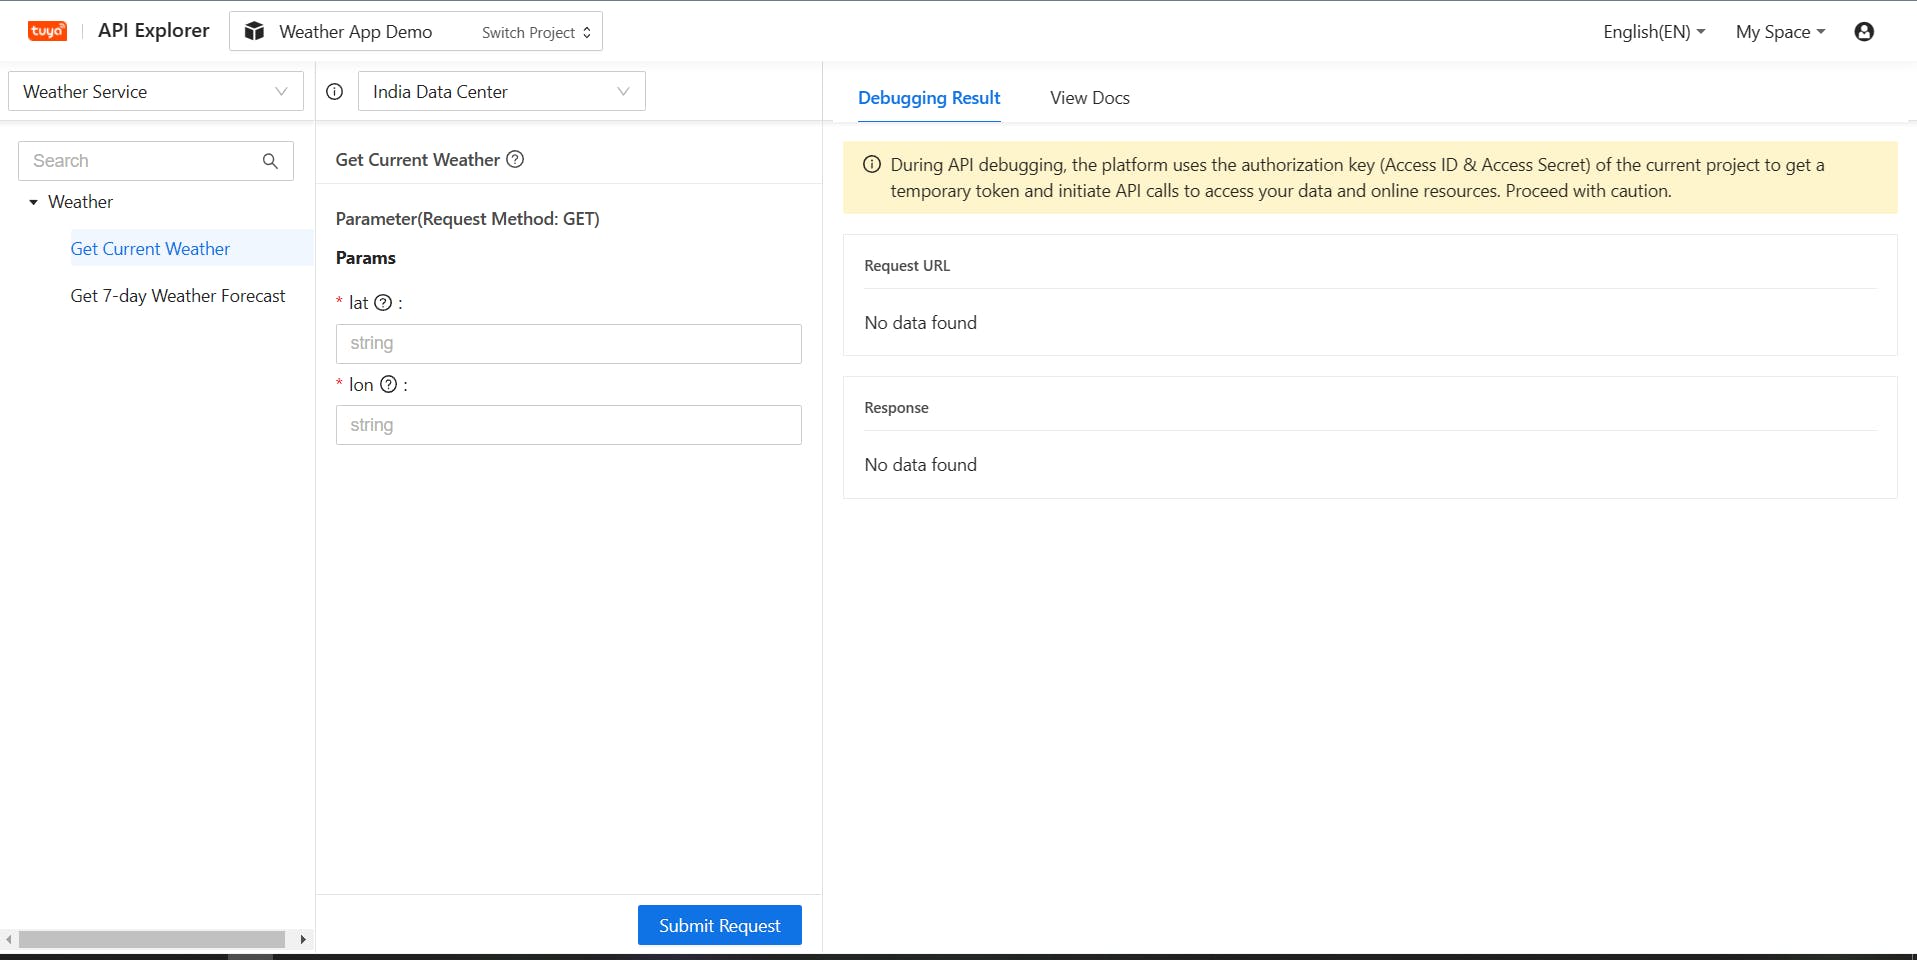
Because.. many reasons! The first thing is it's free and very easy to configure things if you study Tuya docs for an hour. And it has an API Explorer on itself which helps you to figure out how things are happening and how the output will be like.
And if you are caring much about data security, Tuya Cloud provides a five-layer security strategy to ensure the security of smart devices without the risk of information leakage so you can think that your data is inside of a highly-secured safe!

Prerequisites
- Tuya Developer Account. Get it here - https://developer.tuya.com/en/
- Tuya Python SDK and Connector
- Tkinter
pip install tuya-iot-py-sdk
pip install tuya-iot-py-sdk
- Some Basics of Python
Creating The Tuya Project
After signing up using the above link, you will head over to the dashboard. From there, go to 'Cloud' and create a project inserting the following information.
Make sure your Data Center is correct.
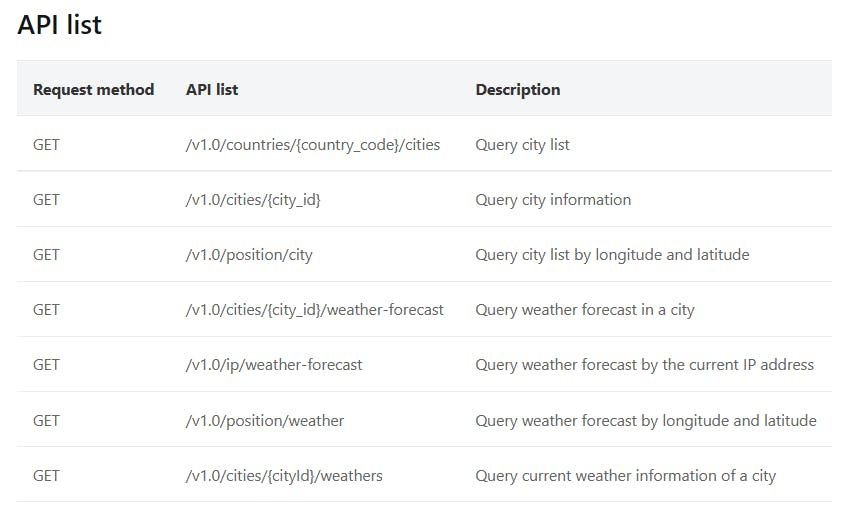
Next, you will be asked to Authorize APIs. They give some APIs by default but we don't need them. So you will have to remove most of them and keep only these four (Device Location is optional, just for future improvements).
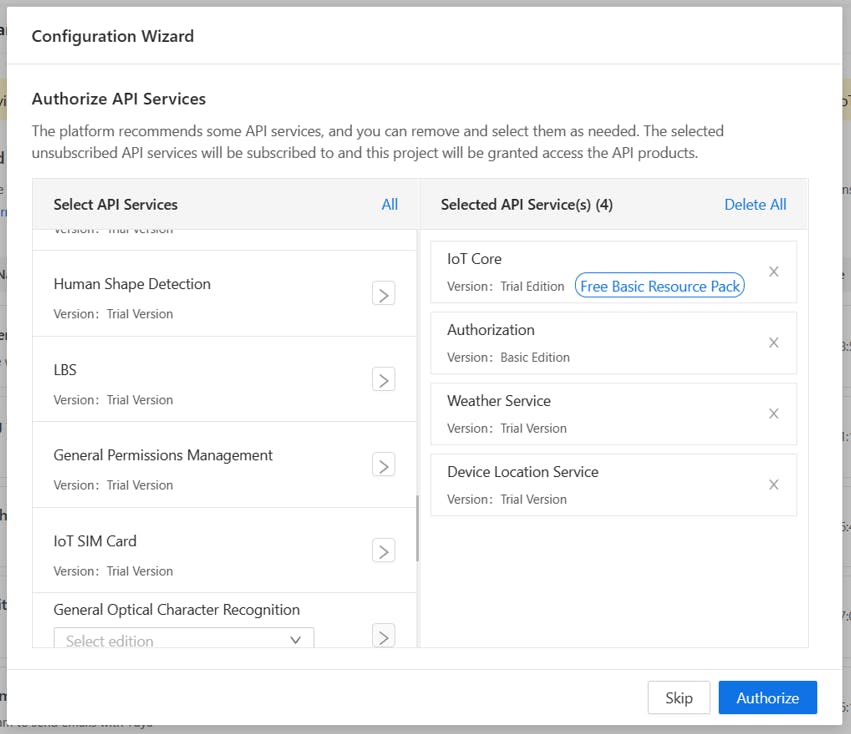
Everything is now set up! Finally, we have,
Coding Part!
First of all, we should import the libraries as below.
from tuya_connector import (
TuyaOpenAPI
)

import datetime
from tkinter import *
# Explicit imports to satisfy Flake8
from tkinter import Tk, Canvas, Entry, Text, Button, PhotoImage, font
After that, we should authorize the project by these lines of code.
ACCESS_ID = "*****fyb6fkekonk8qi"
ACCESS_KEY = "*********0d1ab3fb275cf8040fa"
API_ENDPOINT = "https://openapi.tuyain.com"
MQ_ENDPOINT = "wss://mqe.tuyain.com:8285/"
To find your ACCESS_ID and ACCESS_KEY, go to your project and see the Authorization
Access Secret = Access Key
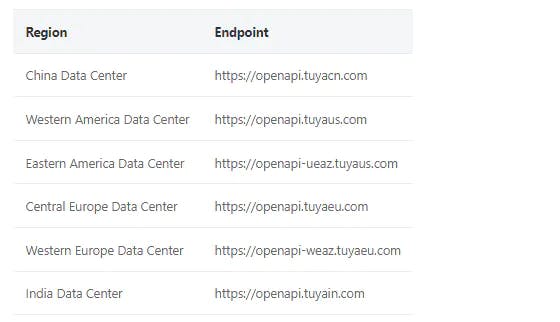
And the API_ENDPOINT should be based on your Data Center.
And then, we have to Init API and Connect
openapi = TuyaOpenAPI(API_ENDPOINT, ACCESS_ID, ACCESS_KEY)
openapi.connect()
Now we just have to send a request and get the output from OpenAPI.
weather = openapi.get("/v2.0/iot-03/weather/current?lat=7.040424985635364&lon=80.00000327776945")

print(weather)
This is a Request Parameter. Request parameters are used in API operations of the Cloud Development Platform. Tuya supports the following request methods.
POST: Requires the server to perform specified operations.GET: Requests the server to return specified resources.PUT: Requests the server to update specified resources.DELETE: Requires the server to delete specified resources.
You can see that there are 2 words lat and lon. They stand for Latitude and Longitude. Set it to your location (To get the exact latitude and longitude, go to google maps and right-click on the pin after placing it in the right location. Coordinated will be there, you just have to click it and it will be copied to the clipboard.)
Run the program and see the output. It will be something like this -
{'result': {'air_quality': {'aqi': '62', 'co': '1081.47', 'no2': '13.4734', 'o3': '79.304', 'pm10': '28.8763', 'pm25': '17.6388', 'so2': '5.66989'}, 'coordinate': {'lat': '7.0404', 'lon': '80.0000'}, 'current_weather': {'condition': 'Overcast', 'condition_num': '132', 'humidity': '88', 'pressure': '1012.1', 'real_feel': '28', 'temp': '26', 'uvi': '0', 'wind_speed': '3.1'}}, 'success': True, 't': 1639762879759}
Great! Now you have all the info. Now we have to do is creating the GUI.
Creating the GUI
We're going to use Tkinter Canvas for this.
window = Tk()
window.state('zoomed')
window.configure(bg = "#3eedd6")

window.title('Tuya Weather App')

photo = PhotoImage(file = "C:\\Users\\nethm\\Downloads\\tuya logo.png")
window.iconphoto(False, photo)

canvas = Canvas(
    window,
    bg = "#3eedd6",
    height = 1024,
    width = 1440,
    bd = 0,
    highlightthickness = 0,
    relief = "ridge"
)
This piece of code creates a simple window with a background of pale green and has the title— Tuya Weather app with the logo.
Logo:

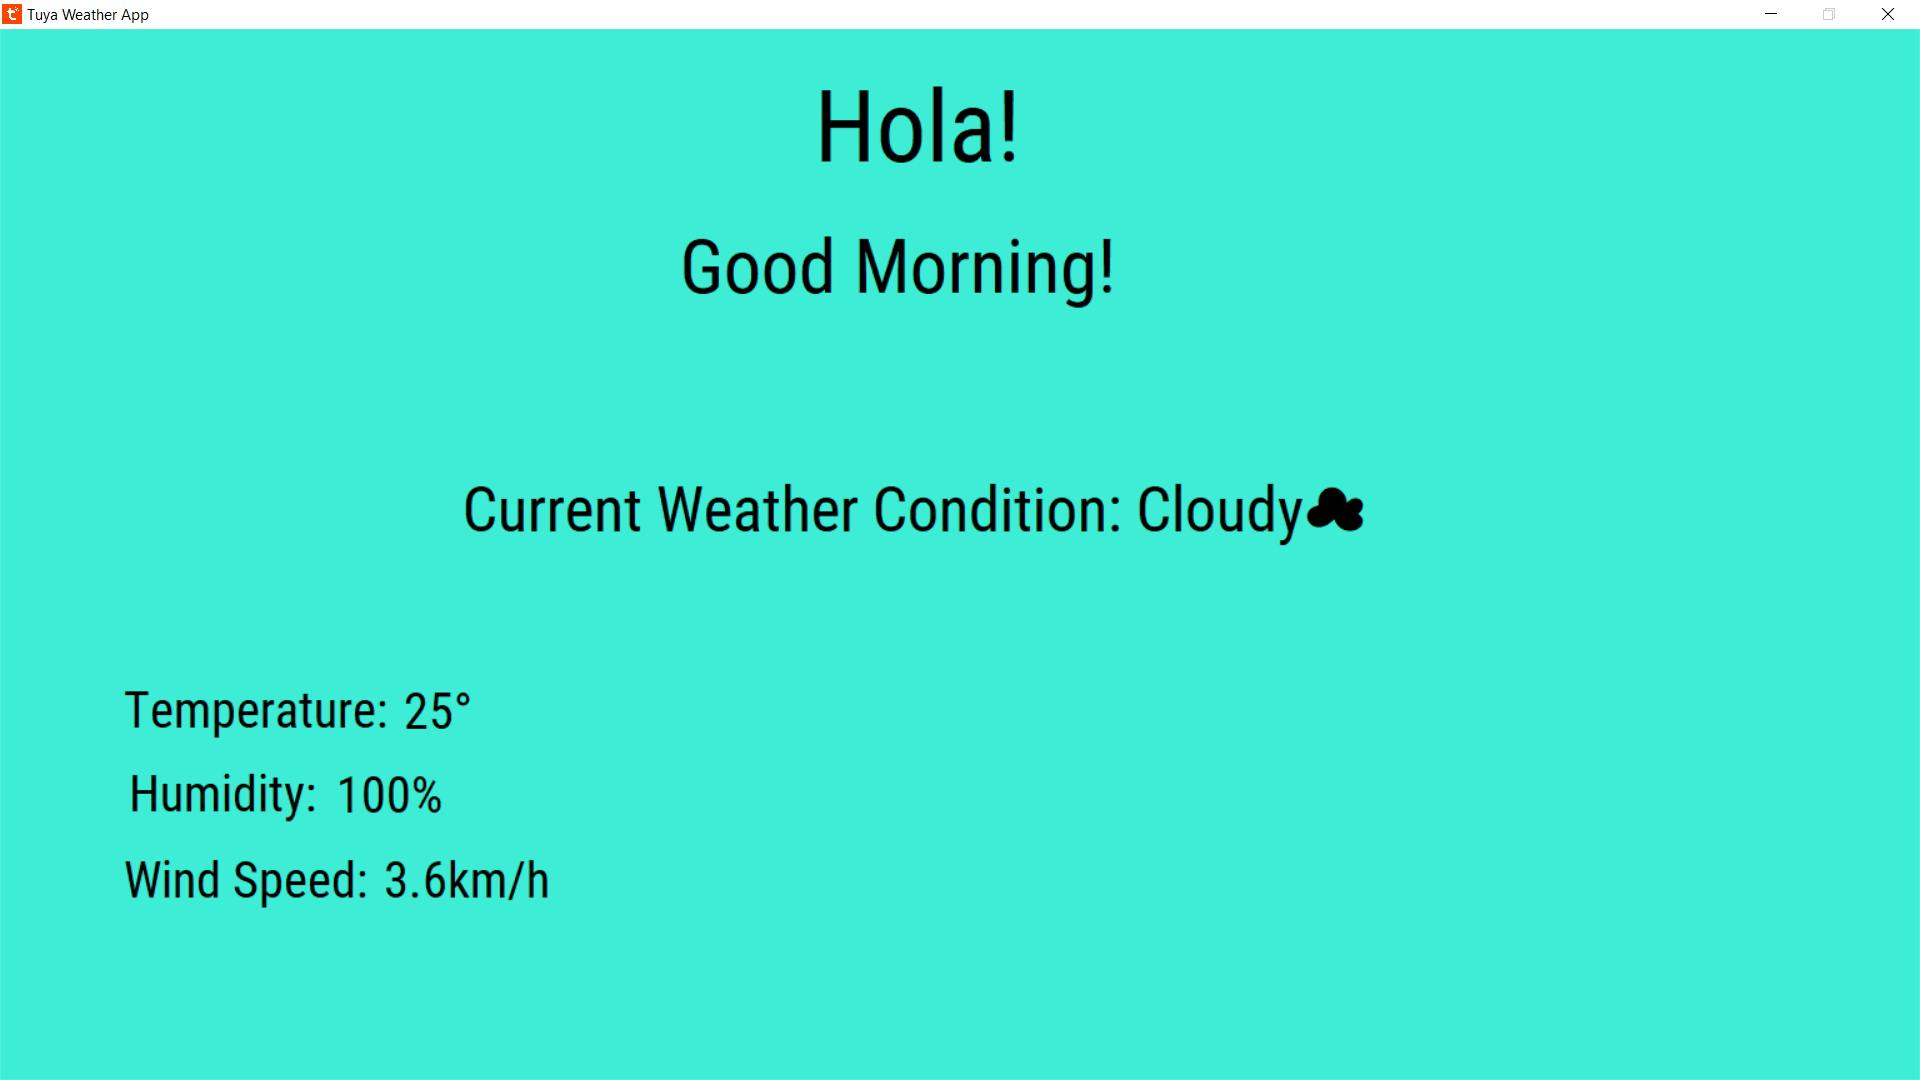
Preview:
After that we need some more logic part for the program. We have to get certain outputs from the Dictionary we got by Tuya API like this,
current_weather_condition = (weather['result']['current_weather']['condition'])
temperature = (weather['result']['current_weather']['temp'])
wind_speed = (weather['result']['current_weather']['wind_speed'])
humidity = (weather['result']['current_weather']['humidity'])
Here what we did is assign variables for certain keys from the output. So if run print(humidity), the humidity will be printed. The reason for this is for the GUI purpose.
Next we have to create a simple Wishing Part using datetime library:
hour = int(datetime.datetime.now().hour)

wish = "Good Morning!"

if hour>=0 and hour<12:
    wish = "Good Morning!"

elif hour>=12 and hour<18:
    wish = "Good Afternoon!"

else:
    wish = "Good Evening!"
This code is pretty simple, it just says "Good Morning" if the time is less than 12:00, "Good Afternoon" if the time is between 12:00 and 18:00, and "Good Evening", if it is neither morning nor afternoon.
We're almost there, just a few pieces of code! Now, what we have to do is, displaying symbols, or emojis according to the current_weather_condition.
symbol = "🌞"

if current_weather_condition == 'Cloudy':
    symbol = "☁"

elif current_weather_condition == 'Sunny':
    symbol = "☀"

elif current_weather_condition == 'Windy':
    symbol = "💨"
elif current_weather_condition == 'Rainy':
    symbol = "🌧"
One more step. We should create Text Widgets and assign the variables correctly, like below.
canvas.create_text(
    651.0,
    30.0,
    anchor="nw",
    text="Hola!",
    fill="#000000",
    font=("Roboto Condensed", 80 * -1)
)

canvas.create_text(
    544.0,
    154.0,
    anchor="nw",
    text=wish,
    fill="#000000",
    font=("Roboto Condensed", 60 * -1)
)

canvas.create_text(
    370.0,
    354.0,
    anchor="nw",
    text="Current Weather Condition:  ",
    fill="#000000",
    font=("Roboto Condensed", 50 * -1)
)

canvas.create_text(
    99.0,
    521.0,
    anchor="nw",
    text="Temperature:",
    fill="#000000",
    font=("Roboto Condensed", 40 * -1)
)

canvas.create_text(
    103.0,
    588.0,
    anchor="nw",
    text="Humidity:",
    fill="#000000",
    font=("Roboto Condensed", 40 * -1)
)

canvas.create_text(
    99.0,
    657.0,
    anchor="nw",
    text="Wind Speed:",
    fill="#000000",
    font=("Roboto Condensed", 40 * -1)
)

canvas.create_text(
    269.0,
    589.0,
    anchor="nw",
    text=humidity +"%",
    fill="#000000",
    font=("Roboto Condensed", 40 * -1)
)

canvas.create_text(
    307.0,
    657.0,
    anchor="nw",
    text=wind_speed + "km/h",
    fill="#000000",
    font=("Roboto Condensed", 40 * -1)
)

canvas.create_text(
    323.0,
    522.0,
    anchor="nw",
    text=temperature + "°",
    fill="#000000",
    font=("Roboto Condensed", 40 * -1)
)

canvas.create_text(
    909.0,
    354.0,
    anchor="nw",
    text=current_weather_condition + "" + symbol,
    fill="#000000",
    font=("Roboto Condensed", 50 * -1)
)

window.resizable(False, False)
window.mainloop()
Here it is the same code repeated for the purpose of creating Text Widgets. You can see how we used the variables that we assigned before. Now you can run the script and see it yourself!
Next Steps with Tuya 👣
So the tutorial is finished, we move to another project! No, no, there are a lot of improvements you can do to this simple weather app and make it different from other Weather applications. Let's think that the user wants to see a full weather forecast including the next 7 days, you can simply use Tuya's 7-day Weather Forecast service.
By using the Tuya Weather service, you can do many things, and also, giving lat and long is not the only way to get the weather forecast. You can do it by city and IP address as well.
See documentation for more info.
So, buddies, that's all for now. See you soon with another article! ✌
References
- Tuya Cloud
- Tuya IoT Management
- Tuya IoT Core - To connect devices to the cloud efficiently and securely.
